Showing posts with label Cooking 101. Show all posts

Friday, June 1, 2012

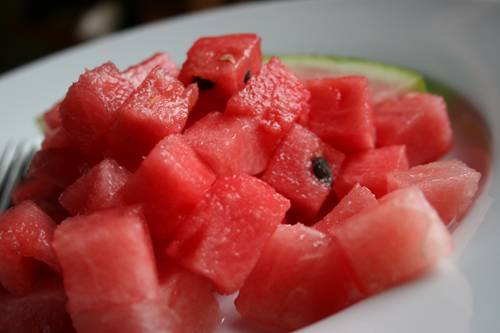
watermelon "salsa"

this is a perfect yummy quick salsa for a hot summer's day!!

3 cups ripe seedless watermelon finely cubed
1 green pepper chopped
1 yellow pepper chopped
2 medium jalapeno pepper's chopped
1 cup sweet onion chopped
1 bunch minced fresh cilantro
1/4 cup fresh lime juice
salt to taste
Tabasco hot sauce to taste

Mix the above together, add salt and Tabasco to your taste and heat preference.  Cover and let salsa rest in refrigerator for  1 hour to macerate. You can serve it with fish, grilled chicken or just with tortilla chips. Enjoy!!

Tuesday, November 16, 2010

adding a little spice

Spice Market Istanbul, Turkey!!

Discover all of the different uses for your spices. Like how to intensify their flavors, store herbs for optimal freshness and how to double a recipe without over-seasoning.

• Ground spices release their flavor more quickly than whole spices. Ground spices such as ground thyme or ground cumin can be used in recipes with short cooking times or can be added near the end of cooking for longer cooking recipes.

• Whole spices need a longer time to release their flavor. They work well in longer cooking recipes like soups and stews.

• Robust herbs such as sage, thyme and bay leaves stand up well in long cooking while milder herbs like basil, marjoram and parsley can be added at the last minute for best results.

• Rub leafy herbs in the palm of your hand to release the flavor and aroma.

• To double a recipe, increase spices and herbs by one and one-half, TASTE and then add more if necessary. In most recipes one and one-half times the seasoning will be sufficient to provide desired flavor.

• Spices such as fennel seed, cumin seed, sesame seed and white peppercorns may be toasted to intensify their flavors. Simply add the spice to a dry, non-stick, heated skillet and heat until aromatic.

• Whole spices and seeds may be best ground using a small electric coffee grinder or spice mill. A pepper mill or mortar and pestle may also be used.

Allspice... Use with meat, fish, gravy, soup and stew, pickles, spice cakes & cookies pumpkin and squash. The taste of allspice resembles a blend of spices.

Anise... Use in candies, baked goods and pork. Has a licorice-like flavor

Basil... Use in sauces, vegetables, salads, meat, seafood, egg dishes. Leaves are used fresh or dried.

Bay... Leaves Use to season meats, fish, potatoes, sauces, soups & stews. Leaves are usually used whole and removed before serving.

Caraway... Seeds Use on breads, especially rye bread; also in cheeses. Has a flavor similar to dill.

Cardamom... Use in curries, cookies & other pastries, breads, and pickles. Common in Scandinavian and Middle Eastern dishes; has a sweet, lemony flavor.

Cayenne Pepper... Use in meats, soups, sauces, chili, seafood, Mexican & Cajun dishes. Thin, red and yellow, very hot peppers are used whole, or dried and ground.

Celery Seed... Use in salads, pickles and relishes, sauces, soups and stews, and on beef. Seeds are sold as whole or ground; also combined with salt for celery salt.

Chervil... Use in egg & cheese dishes, vegetables, soups and stews, salads, and creamy sauces. Looks similar to parsley; common in French cuisine.

Chili Powder... Use in chili, sauces, curries, Mexican foods. A combination of chili peppers plus other spices, including cumin.

Chives Use... in cheese dishes, eggs, fish, sauces; as a garnish in soups, salads, and vegetable dishes. Long hollow green leaves have a mild onion flavor. Best when used fresh, but also used dried.

Cinnamon... Use in pastries, breads, cakes, cookies, pies, sauces, apples, pumpkin and squash recipes. Cinnamon sticks are sometimes used in beverages. A highly aromatic spice available as cinnamon sticks and as a ground powder.

Cloves... Use in cakes, cookies, and candies, ham, sauces, pickles and relishes. Have a strong, spicy-sweet flavor; used whole or ground. If used whole, they are removed before serving.

Coriander... Use in curry, pickles, breads, cakes, and cookies. Small fragrant seeds are used ground or whole; have a slight lemony flavor. Leaves of the same herb are known as cilantro.

Cumin... Add to curries, meats, cheeses, sausages, seafood, pickles, rice dishes, and chili. Small fragrant seeds; a main ingredient in chili powder.

Curry Powder... Use in rice, lamb, poultry, eggs, and vegetables; used in many Indian recipes. Curry powder is not a single spice, but combination of several spices such as coriander, ginger, turmeric, fenugreek seed, cumin, pepper, cloves, and other spices.

Dill... Used mainly in pickles, but can also be used in breads, soups, meats, and salads. Also known as dill weed, both the leaves and seeds of this flavorful herb are used to season foods.

File' powder... Use to thicken and add flavor to Gumbo and other Creole dishes. Heat has an adverse affect on File, so add it after a pot of food has been removed from the oven or stove. File' powder is made from dried, ground sassafras leaves. It has a root beer like flavor.

Fennel Seed... Use in pickles, pizza and spaghetti sauces, breads, cakes and cookies. A member of the parsley family, grown for its sweet seeds; has a flavor similar to anise.

Garlic... Use in meats, chicken, seafood, stews, sauces, marinades, salad dressings; used in many Italian and Chinese dishes. An herb related to the onion, used fresh or dried; also has many health benefits and medicinal uses. Its bulb is composed of several small cloves.

Ginger... Use in Oriental dishes, meat, poultry, seafood; also in squash and pumpkin recipes, cookies, cakes, and breads. Ginger root is used fresh or dried, whole, ground, or cracked; has a strong spicy-sweet flavor.

Mace... Use in cakes, doughnuts and other baked goods; fish, meat stuffings, and in pickles. Made from the coating of the nutmeg seed; used both whole and ground; has a flavor similar to nutmeg, but with a touch of cinnamon.

Marjoram... Use as a seasoning for lamb, soups, stews, fish, poultry stuffing, sausages, beans and other vegetables; alao in beverages and jellies. Also called sweet marjoram; the leaves are used whole or ground. It has a sweet, minty flavor.

Mint... Use in fruits, desserts, jellies, candies, beverages, and as a garnish. Mint leaves have a distinctive flavor and smell. It's used fresh or dried, whole or chopped.

Mustard... Used as ground mustard in salad dressings, sauces, cheese and egg dishes.

Mustard seeds are commonly used in pickles, relishes, salads, beets, cabbage, and sauerkraut. Mustard is sold as whole seeds or as a finely ground yellow powder. It has a strong, hot flavor.

Nutmeg... Use in breads, cookies, cakes, custard, pies, desserts, vegetables. Used either ground or as a whole seed, nutmeg has a sweet, aromatic flavor.

Oregano... Use in tomato dishes, pizza, spaghetti sauce; in Greek, Italian, and Mexican dishes. Ground oregano is an ingredient in many types of Italian food. It has a flavor and aroma similar to marjoram, but stronger.

Paprika... Use as a garnish for potatoes, potato salad, eggs, deviled eggs, beef, poultry, salads, and salad dressings. A mild red spice, always used ground; used not only for its flavor, but for its red color.

Parsley... Use in soups or salads as a seasoning. Goes well with almost any meat as a garnish. Parsley sprigs are used mainly as a garnish for foods and are often left untouched. It's used fresh or dried as a seasoning.

Black Pepper... Use to strengthen the flavor of meats, poultry, fish, eggs, cheese, vegetables and more. Black Pepper can be purchased as ground or as whole peppercorns. It's best when freshly ground.

Poppy Seeds... Use as a topping for rolls, breads, cookies, butters, and pastas. Poppy seeds have a crunchy, nut-like flavor. It's used as whole seeds; can also be used crushed or ground.

Rosemary... Use to season lamb, beef, veal, poultry, soups and stews, potatoes, and breads such as rosemary focaccia. Small needle-like leaves are used dried or fresh, whole or ground; has a sweet but bold aroma and flavor,

Saffron... Use in rice dishes and other Mediterranean cuisine; used in paella, bouillabaisse, and sometimes in chicken dishes. Saffron is sold as a ground powder; has a yellow color and a slightly bitter taste.

Sage... Use to season sausage, poultry stuffings, veal, pork, meat loaf, stews, and salads. An herb grown for its leaves, used as rubbed or ground; has a slightly lemony taste.

Savory... Use with lamb, beef, poultry, egg dishes, squash, beans and lentils. Leaves are used fresh, or dried as whole leaves; has a flavor similar to thyme.

Sesame Seeds... Use on bread, rolls, bagels, salads, and in stir fry. Sesame seeds are always used as whole oil seeds. Most are used on hamburger buns.

Tarragon... Use to season veal, lamb, beef, poultry, seafood, eggs, salads, dressings, mushrooms, asparagus. Leaves are used fresh or dried, whole or ground; has astrong spicy smell and taste. If using dried tarragon leaves, remove them after cooking, since once dried they will not soften again when cooked.

Thyme... Use in poultry, poultry stuffing, pork, beef, tomatoes, tomato soups and sauces. An herb used both fresh and dried, whole or ground. It has a strong, but pleasant flavor, resembling a blend of cloves and sage.

Turmeric... Use in curries, poultry, relishes, pickles, eggs, rice. A member of the ginger family; an orange-yellow powder with a mild flavor.

Have fun and enjoy adding a little SPICE!!

Tuesday, September 14, 2010

soaking and cooking beans

Beans and legumes are an excellent source of vegetarian protein and a staple of many vegetarian diets. The drawback is that they take a long time to cook, but once you know the techniques, you'll find it's not difficult at all. Most of the time they are just soaking or boiling on their own; your actual "hands on" time is only about 10 minutes.

Washing Beans and Legumes
Before using beans and legumes, rinse them thoroughly under cool water, then sort through them for any stones or other debris. If using lentils, mung beans, or split peas, skip the soaking section and go right to the cooking instructions. If using anything other kind of beans, continue to the next step: soaking.

Soaking Beans and Legumes

All dry beans and legumes except lentils, mung beans, and split peas should be soaked before cooking. Soaking shortens the cooking time and makes the beans more digestible. To soak, cover the washed beans with four times their volume of water (no salt*), then choose one of these soaking techniques.

1)Normal soak: Leave the beans to soak for at least 6-8 hours (larger beans need more time). This is the traditional and healthier method of soaking beans. (If you put them on to soak at night, they'll be waiting for you whenever you're ready the next day.)

2)Quick soak: Bring the beans to a boil for one minute, cover, and let sit for one hour.
The beans are soaked once they are uniformly tender and have doubled or more in size.

After soaking, you have two choices:

1)Drain the soaking water, rinse the beans, and cook with fresh water
2)Cook with the soaking water
The first reduces flatulence, while the second provides more nutrients.

Cooking Beans and Legumes

Whether reusing soaking water or adding fresh, there should be twice as much water as beans. Boil furiously, uncovered, for ten minutes. Skim off any foam that collects at the top, then cover, lower heat, and simmer for 1 hour. Stir in salt (½ tsp per cup of dry beans) and continue cooking until the beans are tender. Stir them every 15 minutes or so, adding a bit more water as needed.

White beans might be done after the first hour, but larger beans like chickpeas need more time. When you think they might be done cooking, cut one bean in half - if the color is consistent, it's done. If there's a lighter patch in the middle, it needs to cook longer.

You do doupke batches and store them too!! I like to freeze them in quarts (about 3-4 cups) you could freeze a can sized portion (1 and 1/2 cups) in a sandwich bag, and then put the smaller bag into a gallon freezer bag, it's so easy and then they are ready to go :)

Hints

*1 c dry beans yields 2-2½ c cooked. Unless otherwise stated, the amounts given in my recipes refer to the cooked volume.

*Salt can disrupt the cooking, so don't add it while soaking or during the first hour of cooking.

*Excessive heat can make soaking beans ferment, so when it's hot out, put soaking beans in the fridge.

canning 101

15 steps to canning your beautiful harvest!!

1) Wash canning jars in hot sudsy water; rinse. Cover with boiling water until ready to fill. Jars used in recipes in which food is processed for less than 10 minutes must be sterilized by immersion in boiling water for 10 minutes. Prepare lids and screw bands according to manufacturer's directions.

2) Fill canner with water; start heating. I uses a Back To Basics stove top water bath canner and I love it!!

3) Prepare only as much food as needed to fill the maximum number of jars your canner will hold at one time. Work quickly, keeping work area clean.

4) Place hot jars on cotton towels to prevent slippage while filling.

5) Fill jars, leaving recommended headspace (space between top of food and jar rim) to promote sealing. Add salt to canned vegetables, if desired (use 1/4 to 1/2 teaspoon for pints; 1/2 to 1 teaspoon for quarts)

6) Add boiling liquid to jar, keeping specified headspace.

7) Release trapped air bubbles in jar by gently working a nonmetallic utensil around the jar's sides. Add liquid if needed to maintain headspace.

8) Wipe jar rim with clean, damp cloth (food on the rim prevents a perfect seal).

9) Position prepared lid and screw band, tightening according to manufacturer's instructions.

10) Set each jar into the canner as it is filled; jars should not touch.

11) Cover canner; process as directed.

12) Remove jars; set on towels or rack, leaving at least 1 inch between jars.

13) After jars are completely cooled (12 to 24 hours), press center of each lid. If dip in lid holds, the jar is sealed. If lid pops up and down, jar isn't sealed. Unsealed jars can be refrigerated and used within 2 or 3 days, frozen (allow 1-1/2-inch headspace), or reprocessed within 24 hours. To reprocess, use a clean jar and a new lid; process for the full length of time. Mark label and use any recanned jars first. If the jars have lost liquid but are still sealed, the contents are safe. However, any food that is not covered by liquid will discolor. Use these jars first.

14) Wipe jars and lids to remove any food residue. Remove, wash, and dry screw bands; store for future use. Label jars with contents and date; include a batch number if doing more than one canner load per day. (If one jar spoils, you can easily identify any others from that canner load.) Store jars in a cool (50 to 70 degrees F), dry, dark place. Use within one year.

15) Enjoy the fruits and vegetables of you labor!!

Wednesday, September 1, 2010

renee's best roast turkey gravy


Homemade turkey gravy is the best and pretty simple , below are the 2 basic ways of making gravy from turkey drippings, the first is to use corn starch, the second one uses flour. Both start with your delicious turkey drippings. Sometimes you may have  more drippings than you need for the amount of gravy you want to make, for each cup of gravy you want to make you need 2 tablespoons of drippings.  The following is to make 2 cups of gravy so you can double it depending on how much gravy you need!!

While your turkey is roasting make your turkey stock for your gravy.

8 cup(s) water
3 large carrots, cut into large chunks
3 large stalks celery, cut into large chunks
2 medium onions, cut into chucks
1 small garlic clove
2 whole bay leaves
1 sprig rosemary
1 steam sage
Giblets and neck from turkey, DO NOT USE THE LIVER
Salt & WHITE Pepper to taste

In 8-quart stockpot or sauce pot, place water, carrots, celery, onions, and bay leaves. Cover until it boils then add giblets, neck, and 1/2 TSP. Reduce heat to medium and simmer uncovered for about an hour. Strain stock into large bowl, discarding vegetables, neck and giblets. You can refrigerate stock for up to 3 days or freeze for 3 months!

Making Gravy with Corn Starch

Place 2 TBS of the drippings in the pan. Dissolve 2 TBS of corn starch in the minimum amount of turkey stock needed to make a thin paste roughly 1/4 C. Pour into pan with drippings and use a wire whisk to blend into the drippings. Stir with a wire whisk until the gravy begins to thicken. As it thickens, slowly add 1 3/4 C turkey stock and 1/4 C good quality heavy cream to the pan and 1 TBS white wine. Alternate stirring and adding liquid, maintaining the consistency you want, for about 5 minutes.  you will end up with about 2 cups of gravy. Season with salt, white pepper!! ENJOY!!

Gravy with Flour

Place 2 TBS of the drippings in the pan and stir in 1 to 2 TBS of flour. Stir with a wire whisk until the flour has thickened and the gravy is smooth. Continue to cook slowly to brown the flour, and stir constantly. Slowly add back some of the previously removed drippings. In addition, add 1 3/4 C stock and 1/4 C good quality heavy cream to the gravy and 1 TBS white wine. Season the gravy with salt, white pepper!! ENJOY!!

Sunday, June 6, 2010

ice cream in a bag

Milk can become homemade ice cream in five minutes by using a baggie! This homemade, creamy treat is a summertime delight for kids and adults :)

1 tablespoon sugar
1/2 cup milk or half & half
1/4 teaspoon vanilla extract
6 tablespoons rock salt
1 pint-size Ziploc baggie
1 gallon-size Ziploc baggie
ice cubes

Fill the large bag half full of ice, and add the rock salt. Seal the bag. Put milk, vanilla, and sugar into the small bag, and seal it. Place the small bag inside the large one, and seal it again carefully. Shake until the mixture is ice cream, which takes about 5 minutes. Wipe off the top of the small bag, open it carefully. Enjoy!

Saturday, May 29, 2010

how to cut a watermelon

Watermelon is one of the most refreshing and 'cool' fruits of the summer season. With approximately 92% water content, this juicy and thirst-quenching fruit is a favorite of all dieticians and health conscious people. Moreover, the fruit is rich in potassium, vitamin A and vitamin C and hence, is highly beneficial for health. As summer approaches, we all eye this delicious delicacy of nature. However, to enjoy this great low-calorie sweet treat, the first task would be to crack it open. Though there are sliced watermelons available in the market, buying a whole one would serve as the best option. The latter is fresher and sweeter, when compared to the ones that are available in chunks. Cutting a watermelon can be quite a challenging task, unless you are aware of the best way of doing the same. In the following lines, we have provided information on how to cut a watermelon, easily and safely.
Cutting A Watermelon

Needed:
Watermelon
Serrated knife
Soap
Bowl

The first step would be to rinse the watermelon with a mild soap. This is necessary, as the dirt outside may come in contact with the watermelon flesh, when it is cut. Using the serrated knife, chop off both the ends of the watermelon.

Now, position the knife at one of the ends and slice it through the center. Make sure that you cut along the dark stripes on the outside of the watermelon. This would help you remove the seeds later, as they would end up on the outside of the pieces of watermelon.

Now, cut each half of the watermelon further into sections. Holding the small section in one hand, slice off the watermelon flesh from the rind.

Once you have sliced off the watermelon flesh, cut the big piece into even smaller sections.

Place each of the small sections into a bowl. Your healthy, refreshing treat is ready to be eaten!

Cutting A Watermelon Into Wedges
Needed:
Watermelon
Bowl
Serrated knife
Soap
Fork

Rinse watermelon with soap, to get rid of harmful foreign materials and pat it dry. Cut the watermelon in two equal halves, lengthwise and then further cut down the halves, lengthwise.

Use fork to remove seeds, if you want to and then slice the pieces horizontally, into equal wedges.

If you want to remove the rind, do so by inserting the knife between rind and flesh, to get it away. Your delicious watermelon is ready to eat.

Cutting A Watermelon Into Cubes

Needed:
Soap
Watermelon
Serrated knife
Bowl
Chopping Board

Wash the watermelon using mild soap and pat it dry. Now, cut the watermelon from both ends and let it stand on one end on the chopping board, so that it does not shake while you are cutting it. Remove the rind from the watermelon, by slicing it out and further cut it into two halves.

Now, cut one of the half into 3-4 pieces, like sliced bread and lay it on the board, to further chop it into 1-2 inch slices.

Cut the pieces in opposite direction, to slice them into cubes. Repeat the process with the other half as well. Your fruit is ready enjoy!!

Friday, May 28, 2010

baby back ribs 101


Baby back ribs are the filet mignon of pork ribs. The trick is find baby back ribs that have not had the meat on top of the ribs trimmed off by a butcher. The best place to find good baby backs is at the large warehouse stores like Costco and at meat wholesalers. Baby back ribs also know as loin back ribs.

Just as beef filet mignon does not have a lot of flavor, pork back ribs do not a lot of flavor. To get the most out of them a marinade is a really good idea and mopping also helps.

Prep is much simpler than for spare ribs. Remove the outer membrane as detail above and your done. Then you can get on to the marinade, mustard, rubs and mops. One very successful method of cooking baby back ribs is 2-2-1. The times are approximate. Lower weight or higher cooking temperatures will shorten the time required. Two hours at 225ºf to 275ºf with smoke to form a nice crust and get the smoke into the ribs. Two hours in foil to tenderize the ribs. One hour to firm up the crust. Add BBQ sauce at the very end of the final hour.

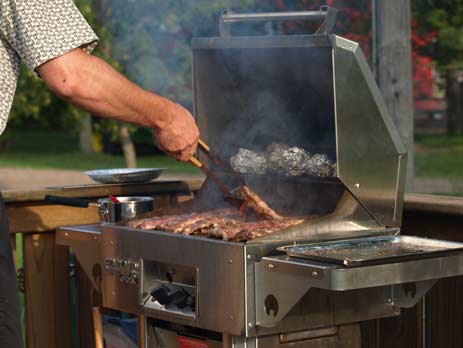
grilling 101

Gas Grilling

Gas-fired grilling has the clear benefit of being extremely convenient. Simply turn a knob, and say hello to your highly adjustable heat source. Gas grills are fueled by liquid propane stored in refillable tanks.

Gas grilling is clean and quick. There's no messing with briquettes, no stacking, no lighting, no smelly starter fluid and no waiting around for the coals to glow. And once dinner is over, there's no ashy mess to clean up. Return the switch to off, rub a metal brush over the grate and clean-up time is over.

On the technical side, gas burns clean, but it doesn't impart much flavor to grilled foods.

Charcoal Grilling

Charcoal grilling might not offer the same level of convenience as gas, but it does boast one benefit that stands out above all others: smoke flavor. The dry, white-hot heat of charcoal sears meat quickly, creating a crusty, caramelized exterior and smoky flavor.

Of course, charcoal grilling requires more time and attention than gas, from building and lighting the briquettes to waiting for the coals to get hot to managing the flame. Since you can't dial down the heat of white-hot coals, it's a good strategy to leave empty spaces on the lower grill grate (areas without briquettes). These cool spaces allow for better control, letting you sear food first over the hot spots before transferring it to cooler parts to finish cooking.

Charcoal grills are also less expensive than gas grills, though the cost of charcoal will add up over the years. Charcoal is also more portable than gas grills. A bag of charcoal can easily be chucked into the car and taken to the park or beach.

And let's face it--charcoal also involves an enticing element of danger. Playing with fire is fun. (Of course, this can be a plus or minus, depending on who's behind the flame.)

Thursday, November 5, 2009

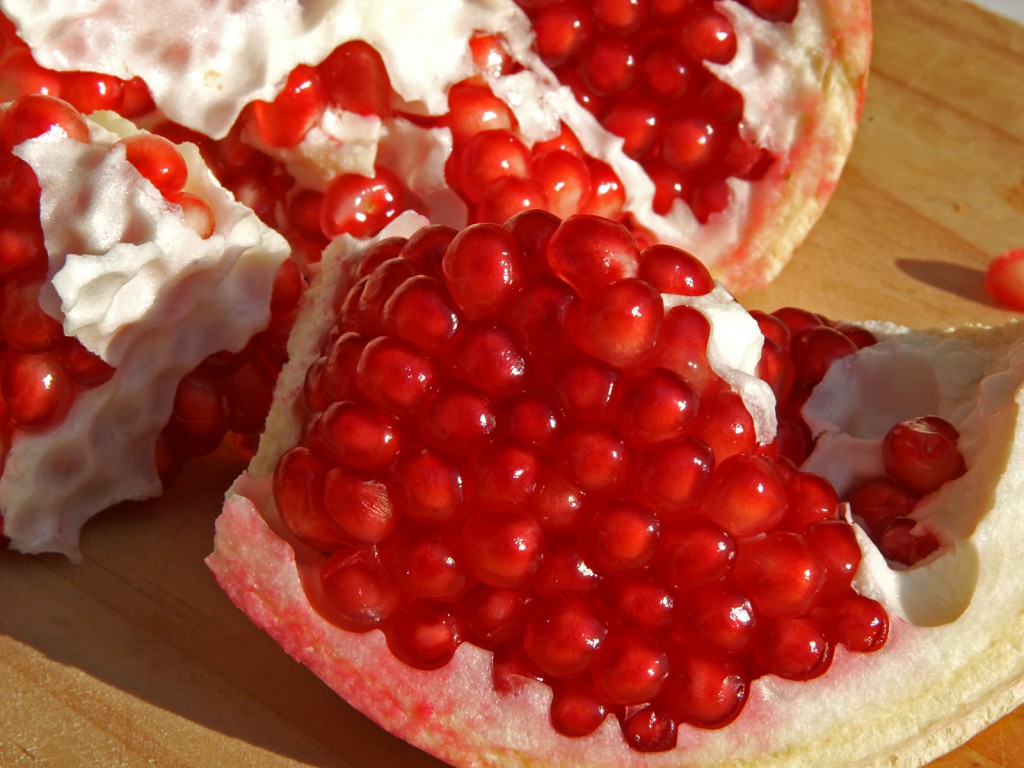
pomegranate 101

One of my favorite Holiday time snacks!!

Eating a pomegranate can be a messy task. The juice can stain your clothes and even your countertops!

The seeds of the pomegranate fruit are sweet, juicy and bursting with flavor. Sprinkled in salads, in fruit salads, over ice cream and sorbet, the seeds add an interesting addition to any dish. The seeds are tasty eaten by themselves!

Before you go biting into this delicious fruit, read these step by step instructions on how to de-seed a pomegranite. It will leave you stain free and with lots of seeds to eat!

Cut off the crown...
Slice the rind in several places...Soak the pomegranate in cold water, upside down for 5-10 minutes...
Break apart the rind of the pomegranate and remove seeds from membrane. The seeds will sink to the bottom of the bowl.
Remove rind and membranes from bowl...
Drain seeds with a collander. Pat dry with cloth or paper towel. Eat immediately or store in an airtight container in the refrigerator for up to two days. Enjoy!!

Sunday, November 1, 2009

turkey 101

Some helpful information from Martha Stewart Living Magazine, November 1996 to help you make the perfect Holiday turkey!!

1. Getting Started
Have ready the following equipment:

Large, heavy roasting pan (not nonstick)
Roasting rack (V-shaped or flat)
Toothpicks or small metal skewers
17-inch square of four-ply cheesecloth
Kitchen twine
Pastry brush
Instant-read thermometer
Fat separator

Remove giblets from the body and neck cavities, and reserve them; you can make Giblet Stock while the turkey is roasting.

Rinse the turkey under cool running water, and pat it dry with paper towels. Tuck the wing tips under the body to prevent them from burning.
2. Stuffing the Bird
Insert the stuffing just before the turkey goes into the oven; never do it ahead of time. And don't pack it too tightly, as the stuffing won't cook evenly and bacteria may grow; also, don't forget to stuff the neck cavity.
3. Securing the Neck Flap
Pull the flap of skin at the neck down, and use toothpicks or small metal skewers to fasten it.
4. Trussing
Pull the legs together loosely, and tie them with kitchen string; a bow will be easy to untie later. Any kind of sturdy white string or twine will do, as long as it's made of cotton, not polyester (which may melt in the oven's heat). Rub the turkey with butter, and season it with salt and pepper.5. The Basting Process
Cover the turkey with cheesecloth that has been soaking in butter and wine; the cloth should cover the breast and part of the leg area. Make sure the cheesecloth never dries out or comes into contact with the inside walls of the oven; in either situation, it may ignite.

Every 30 minutes, use a pastry brush (better than a bulb baster) to baste the cheesecloth and exposed area of the turkey with the butter-and-wine mixture. (The turkey pictured here is out of the oven, but basting should be done in the oven and as quickly as possible, so the oven temperature doesn't drop.) Watch the pan juices; if they are in danger of overflowing, spoon them out and reserve them for the gravy.

After the third hour of cooking, take the turkey out of the oven. Carefully remove the cheesecloth, which will have turned quite brown, and discard it. Baste the turkey with pan juices, taking care not to tear the skin, and return it to the oven.
6. Temperature Taking
After the fourth hour of cooking, insert an instant-read thermometer into the thickest part of the thigh (if you poke a bone, try again); when the temperature reaches 180 degrees, the bird is ready.
7. Carving
Use a thin-bladed, flexible carbon-steel knife to carve the meat into thin slices.

Saturday, October 17, 2009

roasting pumpkin seeds

Roasted pumpkin seeds have a nutty flavor and are packed with protein and fiber. Pumpkin seeds are delicious toasted and salted, but they're even better flavored with sweet and savory spices.

How to Roast Pumpkin Seeds

Rinse pumpkin seeds under cold water and pick out the pulp and strings. (This is easiest just after you've removed the seeds from the pumpkin, before the pulp has dried.) Place the pumpkin seeds in a single layer on an oiled baking sheet, stirring to coat. If you prefer, omit the oil and coat with non-stick cooking spray. Sprinkle with salt and bake at 325 degrees F until toasted, about 25 minutes, checking and stirring after 10 minutes. Let cool and store in an air-tight container.

Why Carve Pumpkins?

The story of the Jack o'Lantern comes from Irish folklore. Jack was a crafty farmer who tricked the Devil into climbing a tall tree. When the Devil reached the highest branch, Jack carved a large cross in the trunk, making it impossible for the Devil to climb down. In exchange for help getting out of the tree, the Devil promised never to tempt Jack with evil again. When Jack died, he was turned away from Heaven for his sins and turned away from Hell because of his trickery. Condemned to wander the Earth without rest, Jack carved out one of his turnips, took an ember from the devil, and used it for a lantern to light his way. He became known as "Jack of the Lantern."


My FAVORITE roasted Pumpkin Seeds with Cinnamon and Salt

4 cups pumpkin seeds
1 teaspoon salt
1/2 teaspoon ground cinnamon
vegetable oil cooking spray

Preheat the oven to 350 degrees F (175 degrees C). Grease a cookie sheet and spread the seeds out in an even layer. Lightly sprinkle with salt and cinnamon. Bake for about 5 minutes, then stir the seeds. Season with salt and cinnamon again. Continue baking, stirring occasionally, for about 20 minutes, or until seeds are toasted.

Wednesday, October 14, 2009

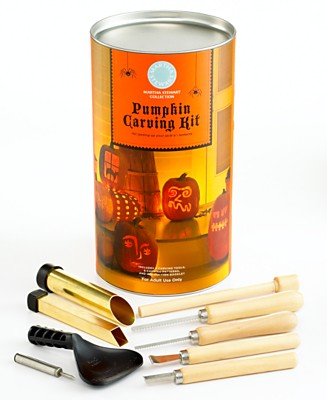
to carve a pumpkin...

This is the best pumpkin carving kit I have found. It has all the tools you will need to make your pumpkin their spookiest!!

Monday, July 27, 2009

fool proof pie crust

Easy and Perfect pie crust every time!!
 
2 1/2 cups all-purpose flour
1 teaspoon salt
1 teaspoon sugar
1 cup unsalted butter, cut into 1 tbsp. pcs., very cold
1/4-1/2 cup cold water

Put the flour, salt and sugar into a food processor and pulse once or twice. Add the butter and process until the mixture looks grainy. Then slowly, while pulsing, add the water until you can form the dough by pressing it between your fingers. Decant the loose dough onto a piece of plastic wrap. Using the wrap, fold the loose dough towards the middle and press with the back of your hands to form dough. Split into two pieces and wrap each and chill for at least 4 hours before using. Dough can be made ahead for up to one week.

Monday, July 20, 2009

steak

A family friend of ours is a grilling expert and I thought his grilling post was very informative!

As I grill, the more I realize that all my philosophies growing up of steaks are incorrect. So let me just clear up the myths vs. fact so you don't run into the same problems I did.

1) Myth: Sirloin is the best and only real cut of steak, because the Sizzler commercials say so.
Fact: Sorry, but my Weber is a "no sirloin" zone. Bring real meat or you won't be allowed to the BBQ.

1) Myth: Make sure you season it well, and maybe marinate it beforehand so you can lock in all the flavors.
Fact: The flavor should be steak, ok. Don't ruin it. A little Montreal Steak seasoning and you're good.

2) Myth: The best way to make sure your steak is done is to keep checking on it, flipping it over to see the other side, and you should definitely cut into it while it's on the grill to see if the middle is done.
Fact: You need to understand your steak way before you put it on the grill. The thickness, the temperature, the cut, whether it's boneless or not--because good steaks are all about timing. Only open the lid of the grill once, only flip the steaks once, and NEVER cut into it or you'll lose all you've worked for.

3) Myth: A steak is best served "hot off the grill"
Fact: Please allow the steak to sit for at least five to seven minutes before cutting into it--preferably longer but I know it's hard. The middle of the steak will rise in temperature and the juices will settle. Again, if you cut into it too soon, you will lose everything.

4) Myth: A good steak requires a good steak sauce
Fact: This may be an obvious one, but ask **** my reaction when she brought A1 to enjoy a NY strip I served. She won't make that mistake again. Sure, if you're having a Sizzler Sirloin then please, feel free, but if you're at my BBQ and you bring steak sauce you'll walk in the front door and right out the back door, which will be locked behind you.

I'm sure there are more lessons, but those are some good ones. By the way, never buy a steak at full price, either...just rotate between the good cuts with whatever is half off.

Sunday, July 19, 2009

ice cream in a bag

Milk can become homemade ice cream in five minutes by using a bag! This homemade, creamy treat is a summertime delight for my boys and yours will love it too!!
•1 tablespoon sugar
•1/2 cup milk or half & half
•1/4 teaspoon vanilla
•6 tablespoons rock salt
•1 pint-size Ziploc bag
•1 gallon-size Ziploc bag
•Ice cubes

How to make it: Fill the large bag half full of ice, and add the rock salt. Seal the bag. Put milk, vanilla, and sugar into the small bag, and seal it. Place the small bag inside the large one, and seal it again carefully. Shake until the mixture is ice cream, which takes about 5 minutes. Wipe off the top of the small bag, then open it carefully. Enjoy!

Just a note... a 1/2 cup milk will make about 1 scoop of ice cream, so double the recipe if you want more. But don't increase the proportions more that that -- a large amount might be too big for kids to pick-up because the ice itself is heavy.

Wednesday, July 15, 2009

lollie pops

1 cup sugar
1/2 cup water
1/3 cup light corn syrup
1/8 to 1/4 tsp. candy flavoring oil (extracts won't work)
Liquid food coloring (as desired)
Candy eyes and/or decorations (optional)

Mix sugar, water and syrup in a lightweight pan over medium-high heat. Bring to a boil. Add candy thermometer, cook to hard crack stage (290 degrees); remove from heat. When bubbles simmer down, stir in oil flavoring and liquid food coloring as desired. Pour hot candy mixture into prepared molds. Remove suckers from molds when cool and beginning to hold their shape. Add decorations if you want. Place on another flat surface to continue cooling. Put cooled suckers into plastic bags.

Monday, July 13, 2009

mussels in creamy garlic sauce

Mussels are a family favorite in our house and once you prepared them once, it was really easy. There is some prep work to clean them but the end result is worth it. You can get a fresh 5 lb bag at Costco on Friday mornings for about $12.00 but go early because they are gone quick...

How Much To Buy: Figure one pound per person of unshucked mussels as a main course, half a pound or more per person as a starter..

Selecting and Storing Mussels: As with clams and oysters, mussels must be cooked while they are still alive. A good fishmonger sells them loose or in mesh bags bathed in water. Smell them. They should smell like the sea. Never buy mussels that are cracked, chipped or broken. If any in the package are open, test them to make sure they’re alive (see below).

Are They Alive? Fortunately, you can determine if the mussels are alive. The shells of live mussels will be tightly closed. If gaping slightly, they should close if you tap on the shell. If any don’t close, discard them.

Cleaning & De-Bearding Mussels.... You want to get rid of as much sand as possible.

Soak the mussels in cool fresh water for 20-30 minutes before cooking. The mussels will expel most of the sand inside the shell as the “breathe.”Then with your hands or a firm brush, clean the mussels under running water. If you harvested the mussels yourself off the rocks at the shore (lucky you!), the barnacles on the shells will take quite a bit more cleaning to get the sand and grit out.Some mussels may have a “beard,” a small web of vegetative matter with which the mussel clings to the rocks. Wait to de-beard the mussels until just before cooking. When you’re ready, the beard is easily removed by gripping it and giving it good tug towards the hinge edge of the shell. If it’s stubborn, you may need to use a knife or kitchen scissors. After steaming mussels (recipes below) remove them to your serving dishes and let the broth rest a few minutes to allow any remaining sand to settle to the bottom. Then carefully ladle or pour out the broth, but not all the way to the bottom.

3 lbs fresh mussels, well scrubbed
1/4 cup butter
1/2 cup good chicken stock
1/2 cup chopped celery
2 carrots, diced
1 medium white onion, chopped
2 cloves minced garlic
1/2 tsp dried thyme
1 bay leaf
1/2 cup white wine
2 tbsp chopped parsley
1 cup heavy cream
salt & pepper to taste
squeeze of fresh lemon juice

In a large stock pot combine butter, celery, carrots, onion, garlic, thyme, bay leaf, cream and white wine. Simmer on low for 5 minutes until veggies are soft. Add mussels and cover tightly and simmer for 7 to 8 minutes, or until mussels open. Taste broth, then add the parsley, salt and pepper. Throw away any mussels that don't open and let sit for 2 minutes to allow any remaining sand to settle to the bottom. Transfer the mussels to a deep serving dish and carefully ladle or pour out the broth, but not all the way to the bottom. Squeeze fresh lemon juice on the top just before serving. Serve with some crusty bread like a good french baguette to soak up the yummy juice.....my boys think this is the best part!! ENJOY, I know you will ;)

Sunday, July 12, 2009

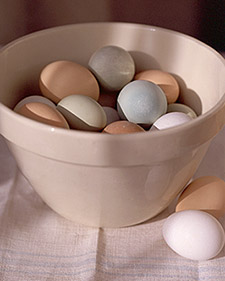
eggs 101

Judging Freshness: To test a raw egg's freshness, place the egg in a bowl of water. If it sinks, it's fresh; if it floats, it is filled with too much air and has gone bad. Also, discard any eggs with any blood spots; these indicate that the hen that produced them was sick.

Storing Eggs:
It is best to store the eggs in the carton they come in, rather than transferring them to the plastic egg holders often found on refrigerator doors, where they will be subject to frequent temperature fluctuations as the door opens and closes.

Boiled Eggs

Despite the name, boiled eggs should not be boiled throughout the cooking process -- a method that yields a rubbery result -- but instead should be brought to a boil and then removed from the heat.

Instructions:
Place eggs in a single layer in a saucepan, and cover with 1 inch of cold water. Bring to a boil, cover, and immediately remove from heat. Let stand approximately 1 1/2 to 2 minutes for soft-boiled, 2 to 2 1/2 minutes for medium-boiled, and 12 to 13 minutes for hard-boiled. Remove eggs from water.Soft- and medium-boiled eggs should be served immediately in egg cups -- perfect for cracking and scooping the egg right from the shell.

Hard-boiled eggs should be removed from the pot and plunged into a bowl of ice water. This prevents the yolk from discoloring due to overcooking and facilitates peeling. Let stand for 2 minutes, then crack by gently pressing the egg against a hard surface. Peel under cold running water. Serve.

Scrambled Eggs

The key to fluffy scrambled eggs is to beat the eggs briskly for at least 15 seconds before cooking, incorporating air to produce large, puffy curds.

Instructions:
In a medium bowl, beat eggs (2 per serving) vigorously for at least 15 seconds. In a medium nonstick skillet over medium-high heat, melt 2 teaspoons butter. When the butter is melted and foamy, add eggs. Reduce heat to medium, and using a spatula or flat wooden spoon, push the cooked eggs toward the center while tilting the pan to distribute the runny parts. When the eggs are almost set, scramble them gently, turning them over a few times. Serve immediately.

Fried Eggs

Break the eggs into a bowl before sliding into the skillet to prevent the yolks from breaking. When a fresh egg is added to a hot skillet, the thick white of the albumen clings to the yolks. To ensure that the egg white is set throughout, gently break the sac with the tip of a spatula to distribute the white evenly.

Instructions:
Heat a medium nonstick skillet over high heat. Break eggs (2 per serving) into a small bowl. When butter is melted, carefully slide eggs into pan, holding the bowl as close to the pan as possible to prevent breaking yolks. Reduce heat to medium, and gently poke egg-white sac to release whites, tilting the pan to distribute them. Cook until whites are set, about 1 minute. (For eggs over easy: After whites are set, carefully turn eggs over with a spatula. Cook 30 seconds on other side). Serve immediately.

Poached Eggs

Always use the freshest eggs you can find for poaching: The thick albumen will hold its shape better around the yolk than older eggs. Add vinegar to the poaching water to help the eggs coagulate faster by preventing the whites from spreading out.

Instructions:
Bring a large, wide saucepan of water and 1 tablespoon of vinegar (any flavor) to a boil. Break one egg at a time into a small heatproof bowl, about the size of one egg. Reduce heat so that the water is just simmering. Slightly immerse the bowl in the water, and gently slide in the egg. After all eggs are added, cover pot, turn off heat, and let stand 2 to 3 minutes. Using a slotted spoon, remove eggs in the order they were added and set spoon briefly on a kitchen towel to drain. Trim ragged edges with a knife or scissors, if desired, and serve immediately.